I Ran a Soft Phone Selfie Through an AI Image Enhancer — What Actually Got Sharper
A friend sent me a soft selfie and asked if I could clean it up before she posted it.
The photo was from a house party that mattered to her, one of those evenings she wanted to actually remember, not just scroll past later.
Trending Now!!:
But the shot itself was rough. Late light, phone held a little too loosely, that soft blur you get when your hand moves right as the shutter clicks.
Her eyes looked tired. Her hair had gone flat and ghosty at the edges. She almost didn’t send it to me at all: her first instinct was to delete it and take another one someday.
Except there wasn’t going to be another one. The moment was already gone. The night was over. There was no reshooting a memory.
So instead of telling her to scrap it, I ran it through an AI image enhancer to see what could actually be saved and what couldn’t.




What Was Actually Wrong With It
Before running the image through anything else, I observed the file so I could know what to actually fix. Five problems became apparent.
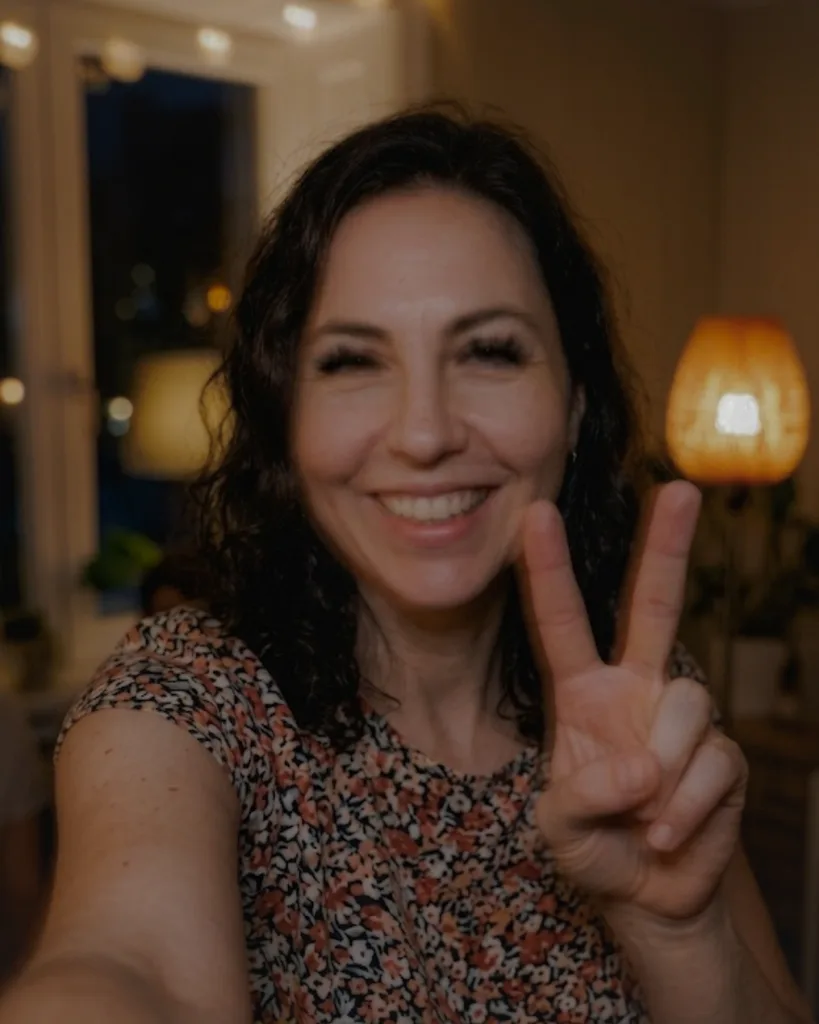
- Motion blur in the bottom half of her face caused by a handshake while the shutter was firing.
- Out-of-focus eyes. Because the lashes were smeared into one black blob rather than clear eyelashes.
- Blurred fingers on the V sign she was throwing up, since they were still moving when the shutter caught them, so they came out as a soft double-edge instead of a clean shape.
- JPEG compression in the dark part of the frame, causing little square pixels you see in photos when phones over-compress dark parts.
- Noise in the lowest parts of the frame – grains produced by the phone camera in order to increase ISO to deal with low light.
All of the above wasn’t “irreparable”.
They are the results of poor shooting conditions but not a damaged or corrupted file, which means I had hopes that an enhancer could still fix it.
How I Actually Enhanced the Photo
I pulled the photo, without cropping or pre-editing, because that would’ve defeated the point. I wanted to see what the tool could do with the mess exactly as it was.
So I uploaded it to Wink’s image enhancer and picked the enhance option.
The focus was on her face, and I had to fix the irregularities. I experimented with different enhancement modes.
I started with portrait mode. Then, since the file was already open, I ran the same photo through Professional HD too, just to see if it actually made a difference.
Portrait mode leaned into the face specifically. Eyes, lashes, and skin tone got the most attention. However, the rest of the frame stayed close to how it started.
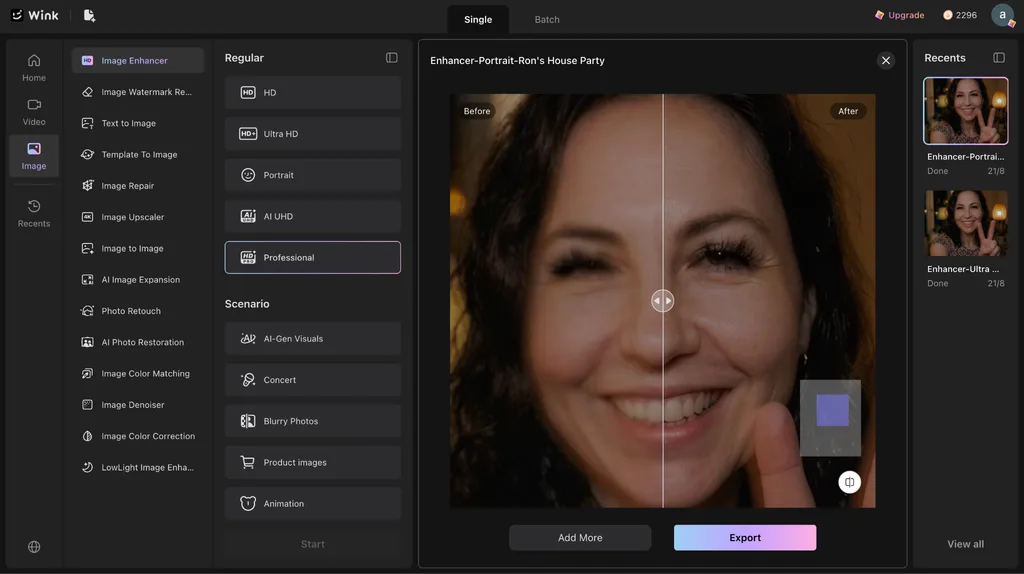
Professional HD treated the whole image more evenly. The fingers on the V sign sharpened up right alongside her eyes, and the background lights lost some of their smear too, not just the face.
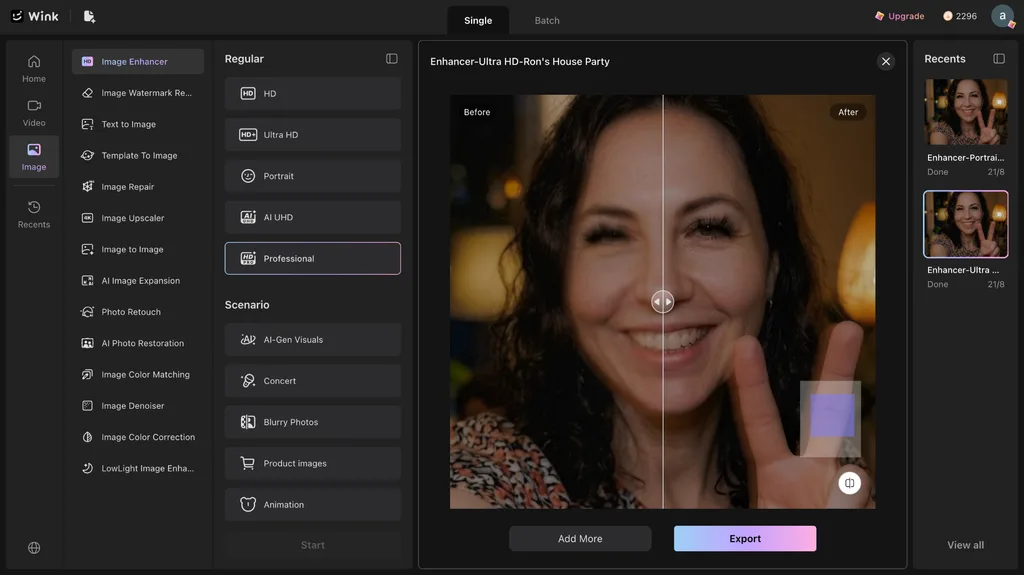
Both images looked better. I loved the results.
It took under a minute either way, and I didn’t touch a single setting.
No sliders for “clarity” or “sharpness” where you’re basically guessing at numbers with no idea what they’ll actually do to your face.
Most tools I’ve used before make you pick a mode or tell them what kind of fix you want. This one just looked at the whole photo and dealt with each problem where it lived.
That’s the entire process. The interesting part isn’t what I did. It’s how little I had to do.
After this, I exported the final image.
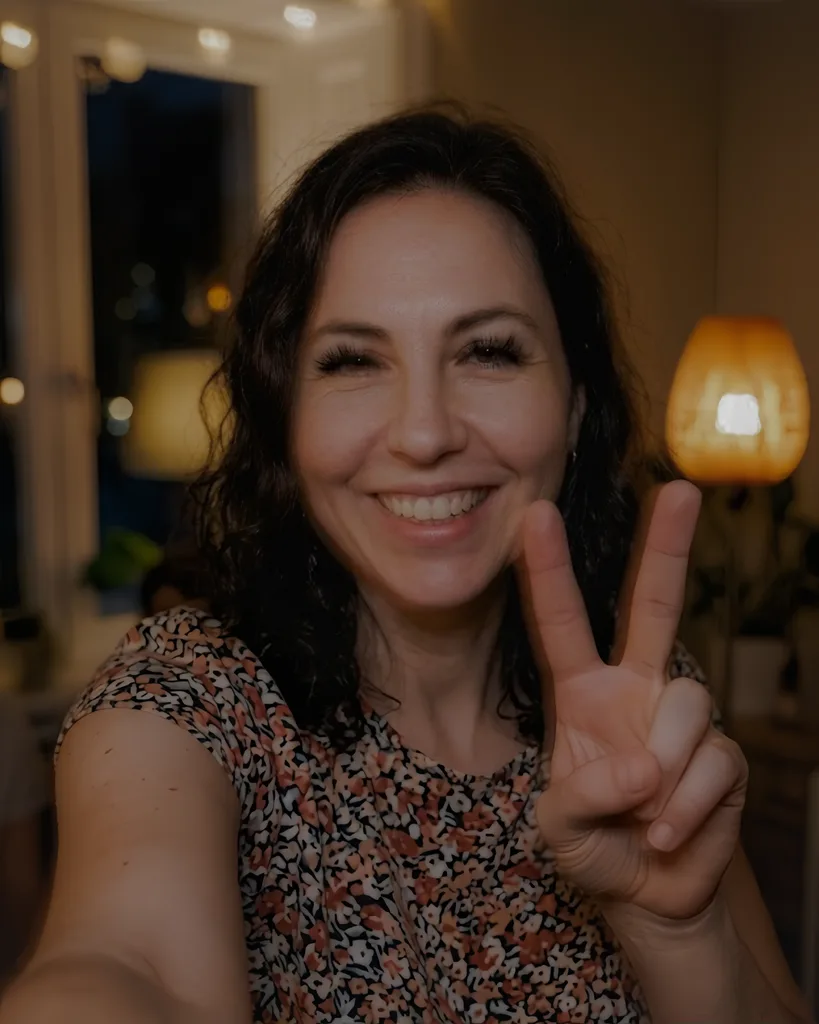
What Actually Got Sharper
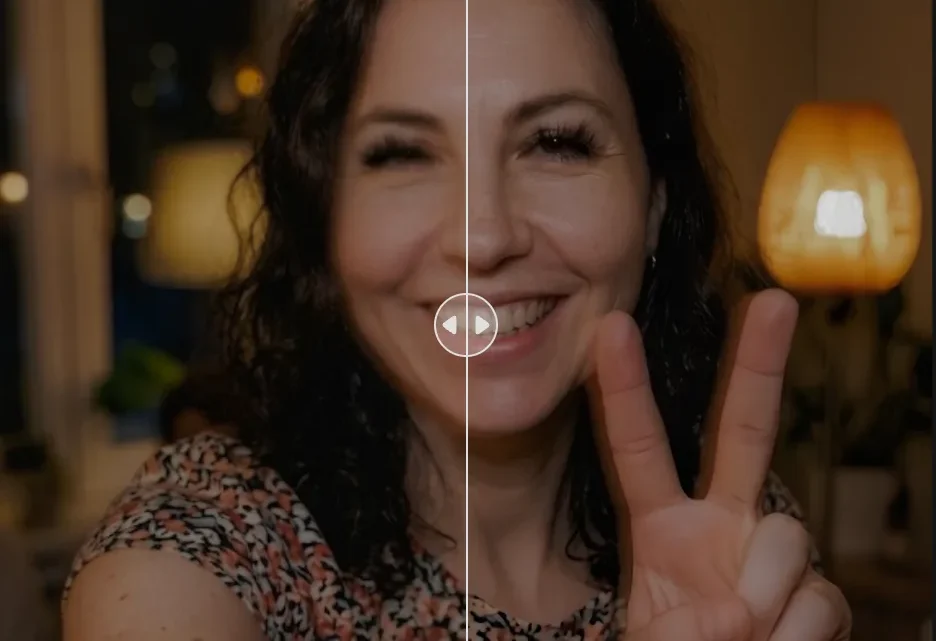
- Eyes: I looked closely first, and the eyeliner smear had separated into individual eyelashes, thin dark lines rather than one smeared spot. The eyes looked like they were awake rather than half shut, and even the small catchlight that reflected a bit of room light was sharp again.
- Balance of lighting and color correction: There was the flat, slightly greenish cast that comes from the lighting of a single ceiling light, as well as the left side of her face, which is farther away from the light, being considerably darker than the right side of her face.
- Hair: Near her temple, the original showed one flat, brownish mass with no depth to it. After enhancing, individual strands separated out, some catching light and going almost golden, others staying dark, which is what hair actually looks like instead of a solid shape colored brown.
The tool refined edges, areas of high contrast where something ends and something else starts, perfectly well.
But the part that actually surprised me was that it didn’t overenhance. Her face didn’t turn into some smoothed-out, generic version of a face.
The proportions stayed hers, the expression stayed hers, even the slightly crooked way she smiles stayed exactly the same.
After all that fixing, it was “still her” in the photo. Not a nicer-looking stranger wearing her face.
Before and After, at a Glance
| Area | Before | After |
|---|---|---|
| Eyes | Lashes smeared into one blob, iris a dark smear | Individual lashes visible, iris shows color, catchlight sharp |
| Hair (near temple) | Flat, brownish mass, no depth | Individual strands, light and dark variation |
| Lighting/color | Flat, greenish cast, one side of face darker | Warmer tone, both sides evenly lit |
| V-sign fingers | Double-edge blur, no clean shape | Softer outline, still not fully resolved |
| Shadow corner | Visible grain, dim | Quieter grain, still present on zoom |
| Skin texture | Natural, untouched | Unchanged, no smoothing applied |
When to Enhance vs. When to Just Reshoot
- If the problem is blur or uneven exposure on a photo you can’t retake, run it through an enhancer. Two minutes, real upside.
- If the framing or moment itself is the issue, no enhancer fixes that. Reshoot instead.
- If fine detail matters more than overall sharpness- hands in motion, tiny background objects- treat the enhance as a solid first pass, then zoom in before you trust it completely.
Final Words
So finally, the selfie looked worth posting on social media.
It looked great, the way she wanted, and more than that, the way she actually looked.
The best enhancement doesn’t come from changing your face. It comes from keeping it the same as you actually are.
It never overenhances, never pushes past “clear” into “different person.” If you’re using this, I’d suggest trying the different modes Wink offers too, since different fixes call for different modes, and keeping your expectations realistic.
Remember: the goal isn’t a better face. It’s your actual one, just clear enough to keep.