How to Refinish Hardwood Floors Without Renting Professional Equipment
You do not need a drum sander, a rental shop, or a contractor's budget to bring dull, scratched hardwood floors back to life. Here is what actually works, from someone who has done it sixty times over.
Somewhere between the third bucket of sawdust and a drum sander that once tried to eat my baseboard molding, I decided there had to be a better way.
That was about twelve years ago, when I was knee-deep in a floor restoration project in a 1940s craftsman bungalow in Columbus, Ohio, and the rental equipment shop was charging me by the day for machinery I had absolutely no business operating alone.
Trending Now!!:
I finished the job, sure. But I also gouged a three-foot section near the hallway closet that still haunts me every time I think about it.
Since then, I have refinished hardwood floors in more than sixty homes, and I can tell you with full confidence that the drum sander is not the only path forward.
For most floors showing the ordinary wear of daily life, dull patches, light surface scratches, high-traffic discolouration, and a finish that has simply given up, the no-equipment or low-equipment approach is not just doable. It is frequently the smarter move.
This guide is about exactly that: how to bring your hardwood floors back to life without stepping foot inside an equipment rental shop.




First, Know What You Are Actually Dealing With
Before you buy a single bottle or open a single can, you need to diagnose your floor. This step separates the people who get beautiful results from the ones who spend a weekend making things worse.
The Coin Test That Changes Everything
Take a coin, preferably a quarter, and lightly drag it across an inconspicuous part of the floor. If the finish flakes off in thin chips, your floor has a wax finish, and the entire game changes.
Wax-finished floors cannot simply be recoated with polyurethane. You will need to strip the wax entirely before doing anything else; otherwise, your new finish will bubble and peel within weeks.
If the coin scratches without flaking, you almost certainly have a polyurethane or aluminium oxide finish, which is the ideal candidate for every technique in this article.
Surface Damage vs. Structural Damage
If bare wood is exposed in high-traffic areas, a full sand-and-refinish will deliver better results, and no amount of liquid chemistry is going to fix that cleanly.
Deep gouges, pet urine stains that have soaked through into the wood itself, water damage that has caused cupping or warping, these are structural problems. Deep gouges require spot repairs or professional sanding. Sanding-free solutions work best for light-to-moderate wear.
Be honest with yourself here. A refinish without sanding is a surface restoration, not a miracle. If your floors look like they survived a renovation war, the methods below will extend their life but not erase everything. For everything else, which describes the majority of floors in homes over ten years old, you are in excellent shape.
The Three Methods That Actually Work
Over the years, I have leaned on three approaches repeatedly. Each one fits a different level of floor damage and a different budget. None of them requires you to rent a drum sander.
Method One: The Screen and Recoat
This is the technique that professional floor finishers use to maintain floors between full refinishes, and it is, in my opinion, the most underrated DIY approach in home improvement. Refinishing hardwood floors with a screen and recoat method is an effective way to restore shine without full sanding. It works best on floors with light wear and an intact finish.
What you are doing here is lightly abrading the existing finish with a mesh sanding screen attached to a standard floor buffer or a rental rotary buffer, which costs a fraction of a drum sander rental, then applying a fresh coat of polyurethane on top. The screening scratches the old surface just enough for the new coat to bond without removing the finish entirely.
The buffer is not the terrifying machine that the drum sander is. It is forgiving, slower, and far less likely to permanently damage your wood.
What You Need for Screen and Recoat
You will need a rotary floor buffer with a 120-grit sanding screen, a vacuum with a floor attachment, a tack cloth or microfiber mop, painter’s tape, floor-safe polyurethane in either water-based or oil-based formula, and a quality synthetic bristle applicator or a lambswool pad.
The Process, Step by Step
Start by clearing the room entirely. Remove every piece of furniture, every rug, every floor register cover you can pop off. Then clean the floor with a hardwood-safe cleaner, not a general floor cleaner and absolutely not anything with wax or oil in it. Murphy Oil Soap is a classic, but I have had excellent results with Bona Hardwood Floor Cleaner, which rinses clean without residue.
Let the floor dry completely. I mean completely, which in humid climates can take longer than you expect. Apply the buffer with the sanding screen in long, overlapping passes, always moving with the grain of the wood. Use overlapping strokes by at least one-third the belt width to remove scratches. After the entire floor has been screened, vacuum thoroughly, then wipe down with a barely damp tack cloth to catch every last particle of dust.
The final result depends heavily on proper prep, especially thorough cleaning and dust removal. Careful application is also key to avoiding streaks or uneven coverage.
Apply your polyurethane in thin, even coats. Do not glob it on. The biggest amateur mistake I see in DIY hardwood floor refinishing is applying too heavy a coat all at once, which causes bubbling, uneven sheen, and long dry times. Two thin coats, with light screening in between, will always beat one thick coat.
Oil-Based vs. Water-Based Polyurethane
This debate has a practical answer. Water-based polyurethane dries faster, has less odor, and stays clear over time, making it ideal for lighter wood species like maple or ash where you want to preserve the natural color.
Oil-based polyurethane takes longer to cure, usually 24 hours between coats versus four to six hours for water-based, but it is more durable and it adds a warm amber tone that a lot of people love on oak and pine. For a quick weekend project with minimal disruption to the household, water-based is usually the better call.
Method Two: Chemical Deglosser and New Finish
Chemical abrasers, also called liquid deglossers, offer another way to refinish old wood floors without sanding. These products break down the existing finish chemically. They create a surface that accepts new coatings without mechanical abrasion.
I discovered liquid deglosser on a rental property job where screening was not an option, a tenant had applied paste wax over polyurethane, and the surface was a mess. The deglosser cut through the chemistry and gave me a bondable surface in under an hour.
Liquid deglossers contain powerful solvents. These solvents soften and slightly dissolve the old finish. This process prepares the surface for a new coating while creating significantly less mess. You won’t deal with dust clouds or heavy equipment.
The trade-off is ventilation. You absolutely must have proper ventilation. Never use chemical deglossers in enclosed spaces. Open every window, run box fans pointing outward, and wear a respirator rated for organic vapours. This is not optional.
How to Apply a Chemical Deglosser
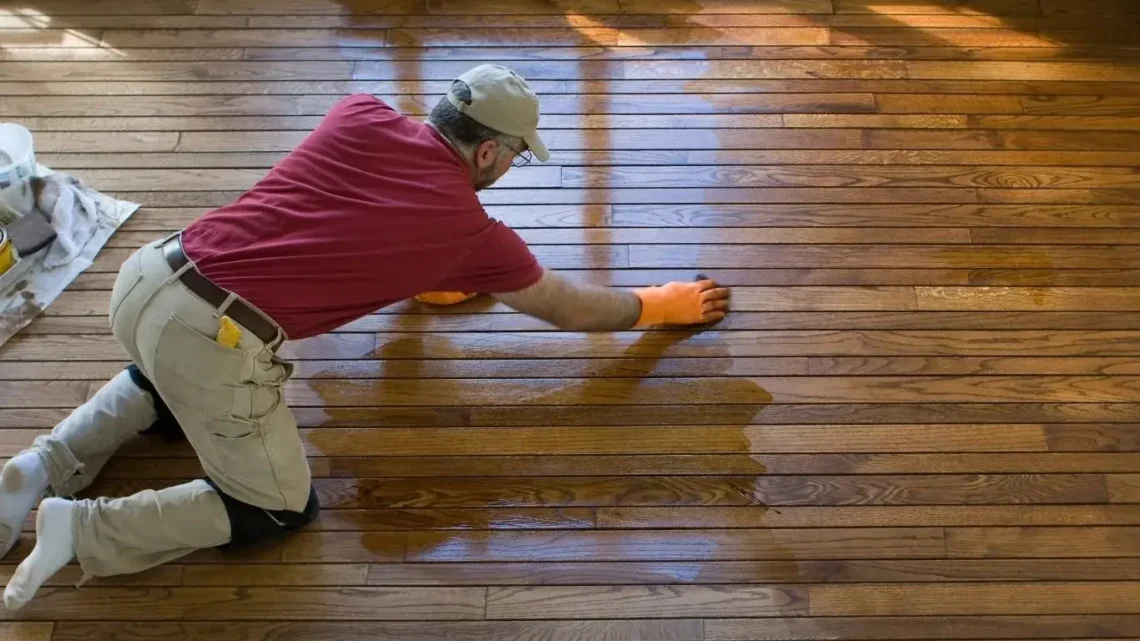
Pour a small amount of deglosser onto the floor, roughly the size of a dinner plate’s worth at a time, and spread it with a clean rag or microfiber cloth using a circular motion. Work in sections of about four square feet. Let it sit for the time recommended on the label, usually three to five minutes, then wipe it clean with a fresh rag. You will see the old finish come away on the rag.
After the entire floor has been deglossed, allow it to dry for at least two hours, then apply your finish coat using the same thin-coat method described above.
Skipping prep: failing to thoroughly clean and degloss leads to blotchy, peeling finishes. Using the wrong product: standard stains often won’t stick to old finishes, so tinted polyurethanes or water-based renewers are safer bets.
Method Three: Floor Revitalizers for Light Restoration
Floor revitalizers are like moisturizer for your wood floors. They won’t fix deep damage, but they can take years off the appearance. This represents the easiest way to refinish old wood floors without sanding.
Products like Bona Hardwood Floor Refresher and Rejuvenate All Floors Restorer fall into this category. They are essentially a thin, self-levelling finish that fills in micro-scratches, restores sheen, and leaves a protective layer on top of the existing finish. The Rust-Oleum Transformations Floor Wood and Laminate Renewal Kit is a popular option in this space as well.
I would not use a revitalizer as a long-term solution, but for a rental unit, a quick sale prep, or a home where the floors are mostly fine and just looking tired, it is remarkably effective and genuinely foolproof.
The application is as simple as cleaning the floor, letting it dry, and applying the revitalizer with a flat microfiber mop. No buffing, no sanding, no chemistry lessons required.
The only caveat: do not apply a revitalizer over a wax finish. The result is a cloudy, slippery, uneven surface that is worse than what you started with.
Hardwood Floor Scratch Repair Before You Refinish
No discussion of DIY hardwood floor refinishing is complete without addressing the scratches and small gouges that need attention before you apply any finish. You cannot simply roll a new coat of polyurethane over a gouge and expect it to disappear. The new finish will follow the contours of whatever is underneath it.
Wood Filler for Gaps and Small Gouges
For gaps between boards and shallow gouges, a latex wood filler matched to your floor color is your best tool. Apply it with a putty knife, pressing it firmly into the gap or gouge, then level it flush with the surface. Let it dry completely, sand the area lightly with 120-grit sandpaper, and vacuum the dust before proceeding.
One thing I learned the hard way: wood filler shrinks as it dries. Always slightly overfill the gap, let it shrink down, and check it again before assuming you are done. If it has sunk below the surface, apply a second thin layer.
Hardwood Floor Touch-Up Markers and Wax Sticks
For surface-level scratches that have not broken through the finish entirely, a touch-up marker in a matching stain colour can work well. Brands like Minwax and Mohawk make markers in a wide range of wood tones. The goal is not perfection here, just minimizing the visual contrast so the scratch does not catch the eye. Follow with a coat of clear floor finish over the spot.
Gel Stain: Changing the Color Without a Drum Sander
One question I get constantly is whether you can change the color of hardwood floors without sanding them down to bare wood. The honest answer is yes, with conditions.
Gel stains are especially forgiving and a go-to for deep color refreshes because they sit on top rather than soaking fully in, which is ideal when sanding isn’t involved. Standard penetrating stains need bare wood to absorb into. Gel stain sits on the surface, which means it can work over a deglossed finish.
After cleaning, applying the deglosser, and rolling on a water-based, tint-in-poly topcoat, floors looked refreshed, though old scratches were still faintly visible in certain light. It extended the lifespan of the floors by a few years until a full renovation was ready.
If you are changing color, manage your expectations. You are darkening, not replacing. Going significantly lighter without sanding is not realistic. But going from a honey oak to a warm walnut tone, or refreshing a faded finish, is absolutely achievable.
The Ventilation and Safety Conversation Nobody Has Enough
I want to pause here because this is the part of DIY hardwood floor refinishing that people treat as a footnote and should treat as a headline.
Polyurethane fumes, particularly oil-based formulas, are not just unpleasant. They are genuinely dangerous in enclosed spaces. The solvents can accumulate and become a fire hazard, and prolonged exposure without proper respiratory protection causes real health effects.
These solvents are flammable and release strong fumes. Work in a well-ventilated area, wear gloves, and keep them far from any flame.
Every time I start a floor project, the first thing I do is map out the airflow in the room. Where are the windows? Which direction is the breeze? I set up box fans at the windows and door openings to pull fresh air across the workspace and push fumes out. I wear a half-face respirator with organic vapour cartridges, not just a dust mask, not just a paper N95. If you are using oil-based products, that respirator is non-negotiable.
Also, oily rags used with oil-based finishes can spontaneously combust if piled together. Spread them flat outside on a non-combustible surface to dry, or put them in a metal container with water until you can dispose of them properly.
The Prep Work That Determines Everything
I have watched homeowners spend more money on premium floor finish than they needed to, only to get a mediocre result, because they skimped on preparation. Preparation is not exciting. It does not feel like progress. But it is the entire ballgame.
How to Properly Clean Hardwood Floors Before Refinishing
Vacuum first, thoroughly, including the edges and corners where debris collects. Then mop with a hardwood floor cleaner diluted per the label directions. Do not let water sit on the floor. Use a barely damp mop and dry immediately behind yourself.
After the floor is clean and dry, walk it carefully and address anything that needs mechanical attention before you apply any product.
Hammer down protruding nails. Find protruding nails by sliding the blade of a putty knife across the floor. Check for squeaks and secure loose floorboards with finishing nails. Seal air vent covers to prevent dust caused by sanding from getting into your ductwork and your home. Use plastic sheeting to seal doors to keep dust from the rest of the house.
This last point matters even with screenless methods. Chemical deglossers and revitalizers still produce some fumes and residue, and keeping the work area sealed from the rest of the house makes cleanup significantly easier.
Remove the Base Shoe Molding
This step gets skipped constantly by people who don’t want the extra work, and it shows in the finished product. Pull up the shoe base molding along where the floor meets the wall.
Pry the molding with a pry bar. Consider using a piece of scrap wood to protect the baseboard. Number or otherwise label each piece as you remove it to make it easier to put it back after refinishing the floor.
When you leave the shoe molding in place, you get an unfinished strip along the perimeter that catches the eye immediately. It takes maybe twenty minutes to pull and reinstall. It is worth every one of those minutes.
Engineered Hardwood: The Floor That Changes the Rules
If your floors are engineered hardwood rather than solid wood, the approach shifts significantly. Engineered hardwood is more limited.
Only the top veneer layer can be sanded, and veneer thickness varies widely. Some engineered floors can be refinished once. Some twice. Many not at all. The challenge is that veneer depth is not always obvious until sanding begins.
For engineered floors, the screen and recoat method works well when the finish is still intact. Do not use a heavy drum sander. A lightweight orbital sander or random orbital sander is generally recommended.
Use a handheld orbital or edge sander for edges and corners. Start with fine-grit sandpaper of 100 to 120 grit. The goal is to remove the old finish and minor imperfections, not a significant amount of the wood.
Chemical deglossers and revitalizers are actually ideal for engineered floors precisely because they do not remove any wood at all. If your engineered floor has a worn finish but the veneer is intact, a deglosser and fresh polyurethane coat is often all it needs.
Drying Times, Curing Times, and the Patience Tax
Every floor project I have ever done has taught me the same lesson: the finish is not ready when it looks ready.
Water-based polyurethane typically feels dry to the touch within two hours, but the full cure time, when it reaches its maximum hardness, is closer to seven days. Oil-based polyurethane takes longer to feel dry, usually eight to twenty-four hours between coats, and the full cure can run two to four weeks.
During the cure period, the floor is vulnerable. Rugs placed too early can leave impressions. Furniture dragged across the surface can scratch through the softening finish. High heels and pet nails are especially problematic in the first week.
My rule: no rugs for two weeks, no furniture slid (only lifted) for one week, and no wet mopping for at least five days after the final coat.
What This Actually Costs, and What It Saves
Refinishing hardwood floors yourself costs between $500 and $1,000, whereas hiring a professional will cost anywhere from $1,100 to $2,663. Those figures assume a full sand-and-refinish either way. With the no-equipment methods in this guide, your costs drop significantly further.
Supplies for a 300-square-foot room using chemical deglossing plus DIY staining usually cost between $100 and $200, much less than full refinishing.
A floor revitalizer for a single room typically runs $25 to $40. A quality can of water-based polyurethane covers 500 square feet and costs around $50 to $70. The sanding screen and a rented buffer for one day comes to maybe $60 in most markets.
For a 400-square-foot living room, the total cost of a screen and recoat done yourself sits comfortably under $200. A professional doing the same work charges between $400 and $900 depending on the market. The savings are real and meaningful.
According to the National Association of Realtors, refinishing hardwood floors is one of the top home improvements for return on investment, often recovering 100 to 150 percent of the cost at resale.
When to Stop and Call a Professional
This guide is built on the honest premise that DIY refinishing has limits, and knowing those limits is as important as knowing the techniques.
If your floors have boards that are warped, cupped, or crowning, those are moisture problems that need to be addressed before any refinishing happens. If there is subfloor damage, pet urine penetration through multiple boards, or evidence of structural issues, surface refinishing is not the solution.
The most serious DIY failures are permanent. Sanding too deep. Exposing fasteners. Creating uneven surfaces that require even more material removal to fix. Judgment matters more than equipment.
The screen and recoat method is forgiving. The chemical deglosser method is forgiving. But if you are tempted to buy a drum sander because your floor genuinely needs one, rent the drum sander and practice on a hidden section first, or call a professional for that step alone.
Find out how much a professional would charge to do just the drum sanding, which is the most difficult, damaging, and potentially dangerous step. Then handle the staining and finishing yourself. That hybrid approach saves real money while keeping the irreversible work in experienced hands.
One More Thing About Mistakes
I want to end where I started, with that gouged section of floor in Ohio. I went back to that house two years later and did a proper screen and recoat on the entire ground floor. It took me one Saturday morning. The floors looked better than they had in years.
The gouge was still there, faint under the new sheen, and it reminded me that every floor project is a negotiation between what you want and what the floor can give.
The methods in this guide are about working with your floors, not against them. They are about getting 80 or 90 percent of the result that a full professional refinish delivers, at 20 percent of the cost, without the dust, the noise, or the machinery that punishes every hesitation.
Done thoughtfully, DIY hardwood floor refinishing is one of the highest-return weekends you can spend in your own home. Start with the diagnosis, choose the right method for your floor’s condition, prepare more carefully than you think you need to, and apply the finish in thin, patient coats.
That is, genuinely, all of it.
What People Ask