")
How to Install a Smart Thermostat (Step-by-Step with Pictures)
Installing a smart thermostat is one of the best DIY home upgrades I’ve done in my 12+ years working with HVAC systems and smart home tech.
I’ve swapped out hundreds of these — from early Nest models to the latest Ecobee and Google Nest versions — and let me tell you, most homeowners can handle it in under an hour.
Trending Now!!:
The payoff? Lower energy bills (I’ve seen clients save 15-25% on heating/cooling), precise temperature control, and app control from anywhere. But here’s the real talk from experience: smart thermostat installation goes sideways fast if you skip prep or rush the wiring.
I’ve fixed plenty of botched jobs where someone shorted a board or left a loose connection that caused cycling issues. Follow these steps carefully, and you’ll avoid those headaches.
Step 1: Check Compatibility and Gather Tools (Don’t Skip This!)
Before touching a screwdriver, verify that your HVAC system is compatible with the smart thermostat you’re buying. Use the manufacturer’s compatibility checker (Nest, Ecobee, and Honeywell all have great online tools).
Common gotcha: Does your system have a C-wire (common wire)? Many older homes don’t, and smart devices need a steady power supply for Wi-Fi. Nest can sometimes steal power without one, but Ecobee usually requires it or their Power Extender Kit (PEK). I’ve had clients buy a fancy model only to discover no C-wire — then spend extra on adapters or call me back.
Tools you’ll need:
- Phillips screwdriver
- Needle-nose pliers
- Smartphone (for photos and app setup)
- Level
- Optional: Small drill, painter’s tape, voltage tester
Pro tip: Do this on a mild day. Nothing worse than installing during a heatwave and losing cooling for hours if something goes wrong.
Step 2: Turn Off Power and Remove the Old Thermostat
Safety first — flip the breaker for your HVAC system (usually labeled “furnace” or “air handler“). Test by trying to run heat/cool; nothing should happen.
Here are some typical ways old thermostats come off: Here are clear examples of removing the faceplate/cover from common old analog/digital thermostats.

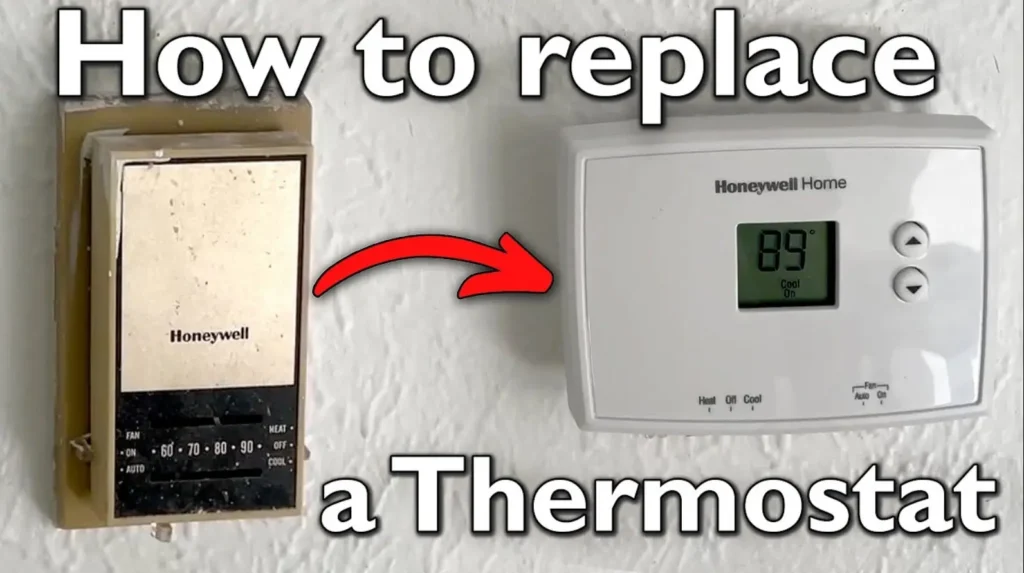
Gently pull the cover off, then take multiple clear photos of the wiring. Label wires with tape if needed (R, W, Y, G, C, etc.). Unscrew the base and pull it away — wires might spring back into the wall, so temporarily tape them to the wall.
Biggest mistake I’ve seen: Forgetting photos. One wrong wire, and your system won’t start — or worse, you’ll fry something.
Step 3: Understand Your Wiring
Thermostat wires are low-voltage (24V), so no shock risk, but connections matter. Standard colors: Red (R/Rc power), White (W heat), Yellow (Y cooling), Green (G fan), Blue/Black (C common).
Here are labeled wiring diagrams showing typical setups for 1-stage heat/cool systems.
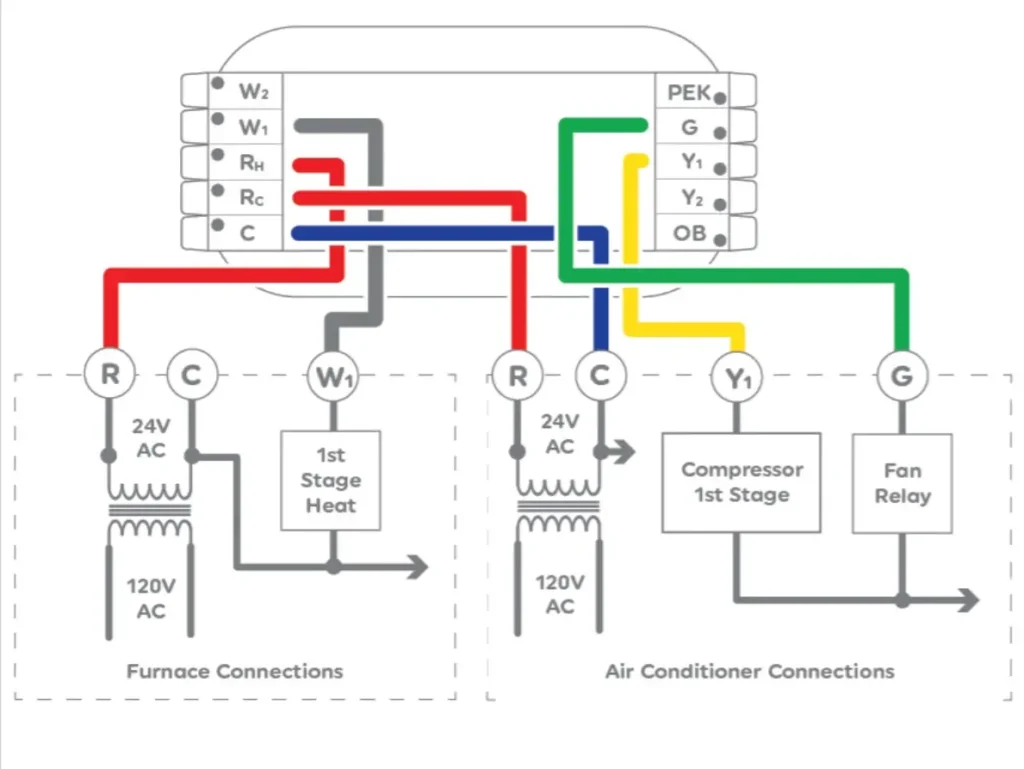
If you have a heat pump or a multi-stage system, double-check the manual. I’ve wired dozens of these, and misplacing the O/B wire on a heat pump is a classic error that causes heating instead of cooling (or vice versa).
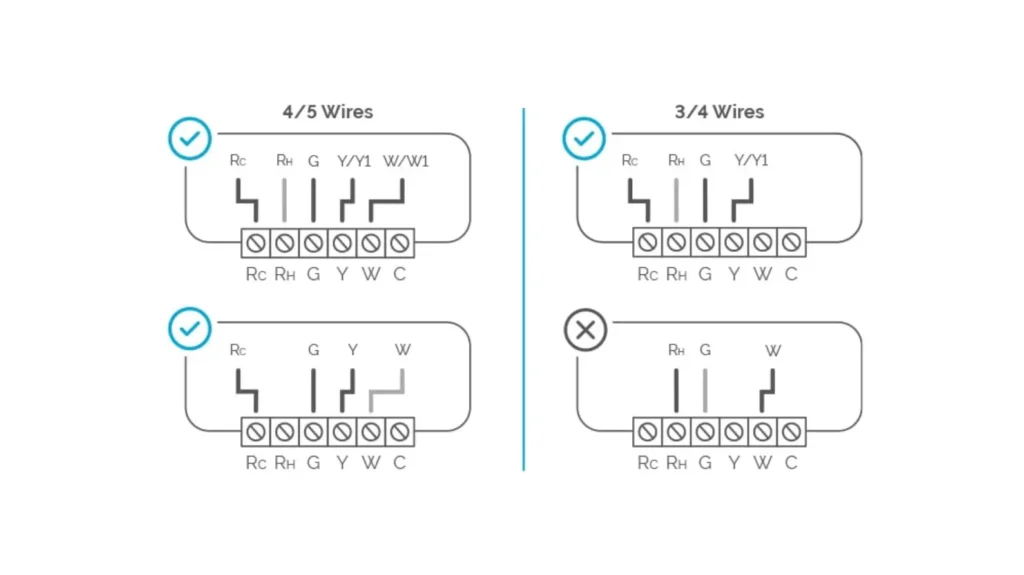
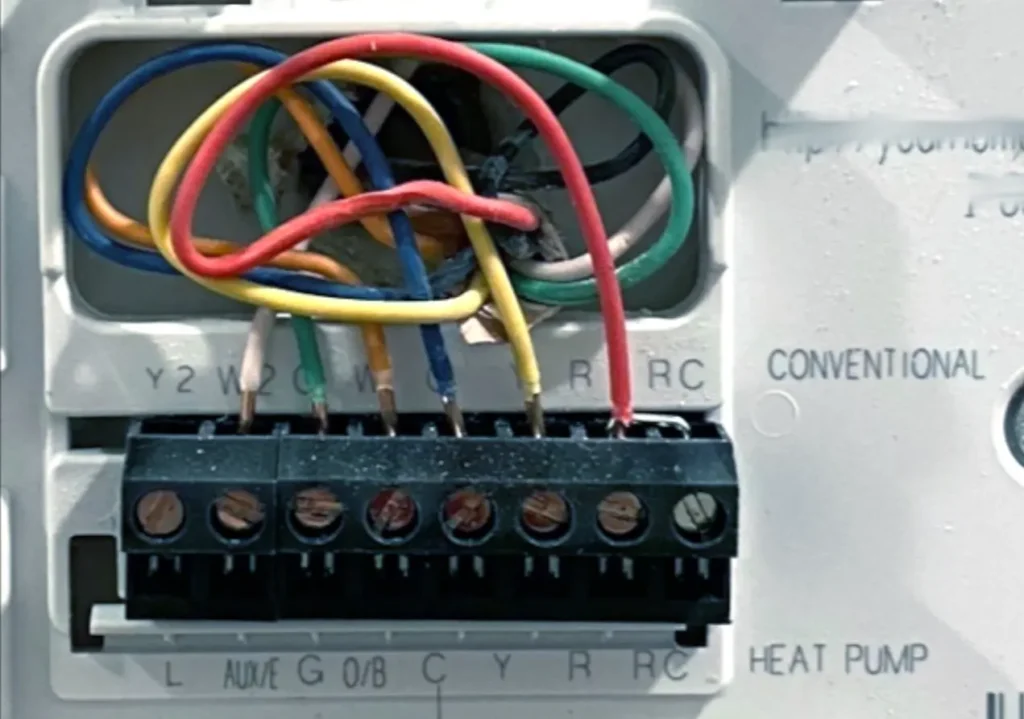
Step 4: Mount the New Base and Connect Wires
Hold the new mounting plate up, use a level, mark holes, and screw it in. Feed wires through the center. Most modern smart thermostats use push-button or lever terminals — no screws needed.
Here are close-ups of attaching wires to the base (one from Nest installation, another general close-up).
Match your old wiring to the new labels. If no C-wire, install the adapter (follow the kit’s instructions—it’s usually straightforward but involves the furnace side).
Step 5: Attach the Thermostat and Power On
Snap the display onto the base. Restore power at the breaker.
Here are the finished installations looking clean on the wall — that’s the goal.

Follow the on-screen setup instructions or use the app (download it first). Connect to Wi-Fi, answer questions about your system, and test heat/cool/fan.
Step 6: Final Tips from Years of Real Installs
- Paint mismatch? Most include a trim plate — it perfectly hides old holes or wall damage.
- Short cycling after install? Often due to poor placement (near drafts/sun) or a loose wire. Calibrate if available (Ecobee excels here).
- App setup is key — Enable geofencing, schedules, and alerts. I’ve seen folks forget this and miss out on 80% of the savings.
- If anything feels off (no power, error codes), stop and call a pro. Better safe than replacing a $300 control board.
There you have it — a real-world step-by-step smart thermostat installation that actually works. Once it’s running, tweak settings over a week; the learning algorithms get smarter with your habits.
If you’ve got questions about your specific setup (Nest vs Ecobee, no C-wire, etc.), drop them — happy to share more lived-in advice! Stay comfortable and save that energy.